
Are you preparing to get married and work very hard to promote your wedding to friends and family? Then it would be a very good idea to create a wedding website! This is a simple, refined yet very easy to use option that will provide you with the exposure and results that you always wanted. Even if you might think that creating a website is hard and confusing, the reality is actually pretty much the opposite. Creating a wedding website has never been simpler and more interesting, which is why you should consider using the WordPress platform and a high quality wedding theme to go with it.
With that in mind, we have created a guide that helps you create a wedding website with WordPress in less than an hour, all you have to do is to follow these 4 simple steps!
1. Choose the domain name and hosting service
In order to create a wedding website with WordPress, first you need both a domain name and a hosting service. A good option when it comes to providers is Bluehost. We feel that Bluehost is the most appropriate for you to use. Not only do you get a very high quality hosting experience with it, but Bluehost also has a great uptime, fast support, easy configurations, and many other features. That alone, combined with some of the best pricing on the market (starting at $3.95/month) makes them a very good choice in this regard. Besides, Bluehost is officially recommended by the WordPress itself since 2005!
How to choose a domain name? A fun domain name for your wedding website is always a good option. After all, this is your wedding and you don’t want to be too format. It is easier to remember for your friends and family who want to access our website anytime. You can think about something like:
- MattAndKaren.com
- KarenSaidYes.com
- MattKaren2017.com
Choose whatever works best for you. Unfortunately, not every domain name would be available, as someone might have already registered the name. Therefore, as soon as you have domain name idea, snatch it up quickly just to be safe! You can use this quick checker below to help you see if the domain name is still available for you. This form would also allow you to start your hosting plan with Bluehost.
2. Install WordPress
After you got your hosting service running, now you need to install WordPress on your hosting. Believe it or not, installing WordPress is very easy to do. You can easily install WordPress via your Bluehost cPanel, or you can watch this video tutorial by Bluehost.
Also, it’s important to keep in mind the fact that WordPress will automatically update to the latest version. This means that you don’t have to worry about having your wedding website hacked or messed with. WordPress will update itself when needed and it will always have the latest security features. This means that you can keep your wedding website online for as much time as you want all while harnessing the best security features on the market.
3. Choose a wedding WordPress theme
When WordPress got installed, you need to think about choosing the right theme for your wedding website. There are a bunch of free or premium wedding WordPress themes which you can choose to create a wedding website. Free themes could do basic needs, but it lacks of customization and it needs more efforts to setup some separate modules like: RSVP, gallery, Google Maps, etc.
Premium themes may cost a bit of money, but you’ll be getting a much more features that free themes probably won’t offer. Besides, many premium theme authors will provide customer support which might be really helpful if you are new to WordPress and find yourself with any theme-related questions. One of the best places to find great premium wedding WordPress themes is at ThemeForest.
While there are many themes to choose from, we recommend you to check out ours: Jack & Rose – Whimsical Wedding WordPress Theme.
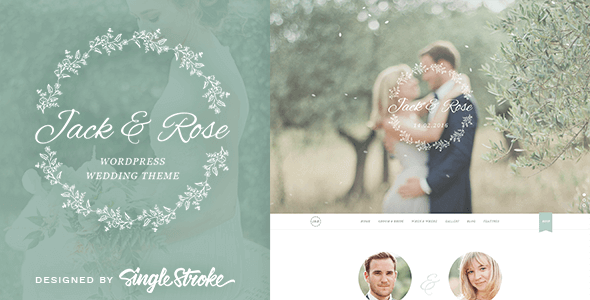
Jack & Rose is a visually stunning & beautiful theme that allows you to showcase your love in a very interesting, unique and refined manner. Designed with great attention to detail, amazing colors and the rich user experience, Jack & Rose is simply the perfect solution to create a wedding website. It is also loaded with tons of important features which a wedding website mostly needs, like:
- Online RSVP form
- Wedding day countdown
- Wedding blog
- Events info box
- Google Maps integration
- Groomsmen & Bridesmaids
- Photo Gallery
- Guestbook page
On top of that, it’s very affordable and you can easily integrate it with your WordPress website on the fly. Plus, we at SingleStroke offers fast & friendly support which means that if you do encounter any problem our customer support team will be there for you. All you have to do is to visit our dedicated support forum, create a new support ticket, and you will receive immediate help from us.
4. Install the theme
From your WordPress admin page, you can upload the theme package and activate the theme. However some premium themes just leave you with default content after installed and you need to configure the theme on your own to make your website looks like the demo site. This process is really time consuming and maybe difficult for some people.
Unlike them, Jack & Rose allows you to integrate the demo data within your website. Named ONE CLICK Demo Data Import, this feature allows you to get the DEMO version of Jack & Rose on the spot with only one click on your WordPress admin page. You will have it installed on your website in no time and based on that you can make the desired changes that pertain to color, style and presentation. For detailed steps on installing Jack & Rose, you can check our documentation page (included in the download package).
Ready to create a wedding website?
Absolutely yes! It takes less than 30 minutes to create a wedding website if you follow all those steps mentioned above. The rest would be a smile on your face, knowing your brand new wedding website is doing well and you can continue preparing your wedding day without worries! We would love to hear your experience while creating a wedding website in the comments section. Thanks for reading!